Tuesday, December 11, 2012
Let's see if I remember how to do this.....
Friday, June 1, 2012
Sabbatical
Friday, May 18, 2012
Fibers on Friday. Grannies!

I've had this pinned on Pinterest for quite some time and I'm finally getting around to making it.
Source: blairpeter.typepad.com via Beth on Pinterest

And now let's see your goodies! Link up your fiber creations!
| | |
| | |
| | |
Wednesday, May 16, 2012
Sit-Upons for Girl Scouts
Along with exploring nature, learning about camp life, and participating in a scavenger hunt, I wanted a couple other projects pertaining to camping. Since this is also my first experience with Scout camping, I spoke with a few other leaders and learned about sit-upons. Evidently, it's a universal rule that no scout ever sit in an adult's chair or seat. It all boils down to fairness and equality....if one girls steals her mom seat and the other girls are left sitting on the ground, it's just not fair and could show favoritism. So.....the creation of sit-upons!
I chose to make them out of vinyl table cloths. I bought new ones (all matching to avoid fighting over certain designs), but finding gently used ones at thrift stores would be a great option, too).
I opted to sew the two sides ahead of time at home and then have the girls stuff their own sit-upon with news paper and sew along the top with yarn at our meeting. Real simple, I just turned them inside out and sewed up the two sides.
Speaking of the stuffing. We just used newspaper. I let the girls choose whether they wanted just a couple layers of flat papers (to protect against the cold ground) or if they'd like to crumple them up for a more cushioned affect. I was leaning more towards just flat layers, so the sit-upon would be easier to just fold up and carry in their back packs.
Monday, May 14, 2012
A Thneed's a Fine Something that Everyone Needs
I wanted to show you the Thneeds I made! I wanted to play on the "sack race" game at kids' parties, but in keeping with the Lorax, I came up with Thneed Races! It was so much fun!
I bought 4 yards of CHEAP knit fabric, folded it in half and laid a tight fitting outfit my kids wear to use as a pattern on top.
You be the judge :-)
Thursday, May 10, 2012
Fibers on Friday: Freezer Paper Stencil Method
You'll need freezer paper. Not waxed paper and not parchment paper. you'll need some fabric paint and a sponge brush.
And that did the trick. It turned out just as I had hoped....even better!
So, that was my work with fiber recently. What have YOU been up to?? Hopefully YOUR projects deal with yarn, but that's OK if you stretch the truth a little!
| | |
| | |
| | |
| | |
Thursday, May 3, 2012
Fibers on Friday: Seeing Stars


Not sure if I mentioned here or not that I'm moving. Again. 9 months after moving here in the first place. It's crazy!! Our landlord sold our house, so we gotz to go. Fortunately we found another rental a few doors down, so we're gradually shifting our stuff up the road.
There are many pros and cons to this move. Not the least of which is my anguish over having to leave my newly planted garden! but, I'll try to work out a co-op situation with the new owners!! that would be a TRIP@!
But, one good thing is a huge wall in the kitchen that is screaming for a potholder collection!! So, I'm going to be good to go with this little artistic display of potholders!!
I'm glad you're here on this Fibers on Friday!! Please link up your yarn related projects!! Have fun!!
| | |
| | |
| | |
Tuesday, May 1, 2012
Lorax Birthday Party: Part One
I had some on display and others were used on the cake (which I bought! Gasp!!)
- After the cake was baked and crumbled, I only added about 3/4 of a can of frosting.
- I only refrigerated the pops for about 15 minutes prior to dipping the the candy coating.
- I dipped the stick in a little of the coating before sticking it into the cake ball. Some will squeeze out the bottom, but once it hardens, it forms kind of a little stopper so the cake ball won't fall down the stick. I used the colorful candy wafers found at most craft stores and just warmed them in coffee cups in the microwave until it was good for dipping.
- I did not refrigerate at all after dipping the pops and forming them into Truffula Trees. I just stuck them into some styrofoam and they were happy over night and did not crack, did not slide, and did not get wet or sticky.
Next up...Truffula Tree Decor:
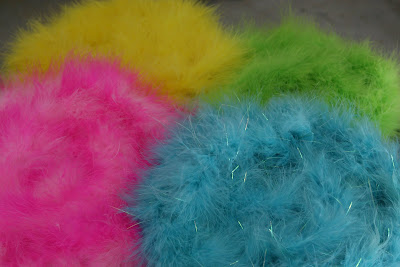
I got this idea from here. The idea is to form truffula trees by putting some feather boas onto a cardboard circle. What really helped with this is the use of my scrapbooking stapler because it has a really long neck to reach into the center of the cardboard. These boas I got from Hobby Lobby and they are just perfect colors!!
Monday, April 30, 2012
Meatless Monday! Sweet Potato Hash
From Better Homes and Gardens.
Ingredients
1 large or 2 small sweet potatoes, peeled and quartered (about 1 lb.)
1 Tbsp. vegetable oil 1 11-oz. can Southwestern-style corn with black beans and peppers, rinsed and drained
1/2 cup dairy sour cream
2 Tbsp. chipotle salsa
3 medium avocado, peeled, pitted and sliced
Fresh cilantro leaves and chili powder (optional)
Directions
1. Place sweet potatoes in a microwave safe dish; cover and cook on 100 percent power (high) for 5 to 8 minutes or just until tender enough to chop. Cool slightly; cut into chunks. Sprinkle lightly with salt.
2. In large skillet, heat oil over medium heat. Add potatoes; cook until browned and crisp-tender, about 3 minutes. Add drained corn to skillet. Cook 3 minutes or until potatoes are tender.
3. Meanwhile, stir together sour cream and chipotle salsa.
4. To serve, divide sweet potato mixture among 4 plates. Top with avocado and serve with chipotle sour cream sauce. Add cilantro and sprinkle chili powder. Makes 4 servings.
Want more meatless recipes? Visit Meatless Monday for ideas and inspiration.

Thursday, April 26, 2012
Fibers on Friday: Turtle
All the little hexagonal shell pieces are made separately and then pieced together. I've gotten 3 hexagons done so far.
Wow me as usual!
| | |
| | |
| | |
|
Monday, April 23, 2012
You Can Cut Fabric With Your Cricut
I've made a couple buntings in the past and I must say it's pretty time consuming cutting out letters from fabric. I wondered if I could cut out the letters on my Cricut. I did some internet searching and found I could. Here is how I did it after compiling some tips and tricks.
Get your fabric and Heat 'N Bond.
And then I flipped it around and used it at their birthday party the next day!